
Quick start
This walkthrough uses nebula-shop, an example storefront repo.
1. Add a project
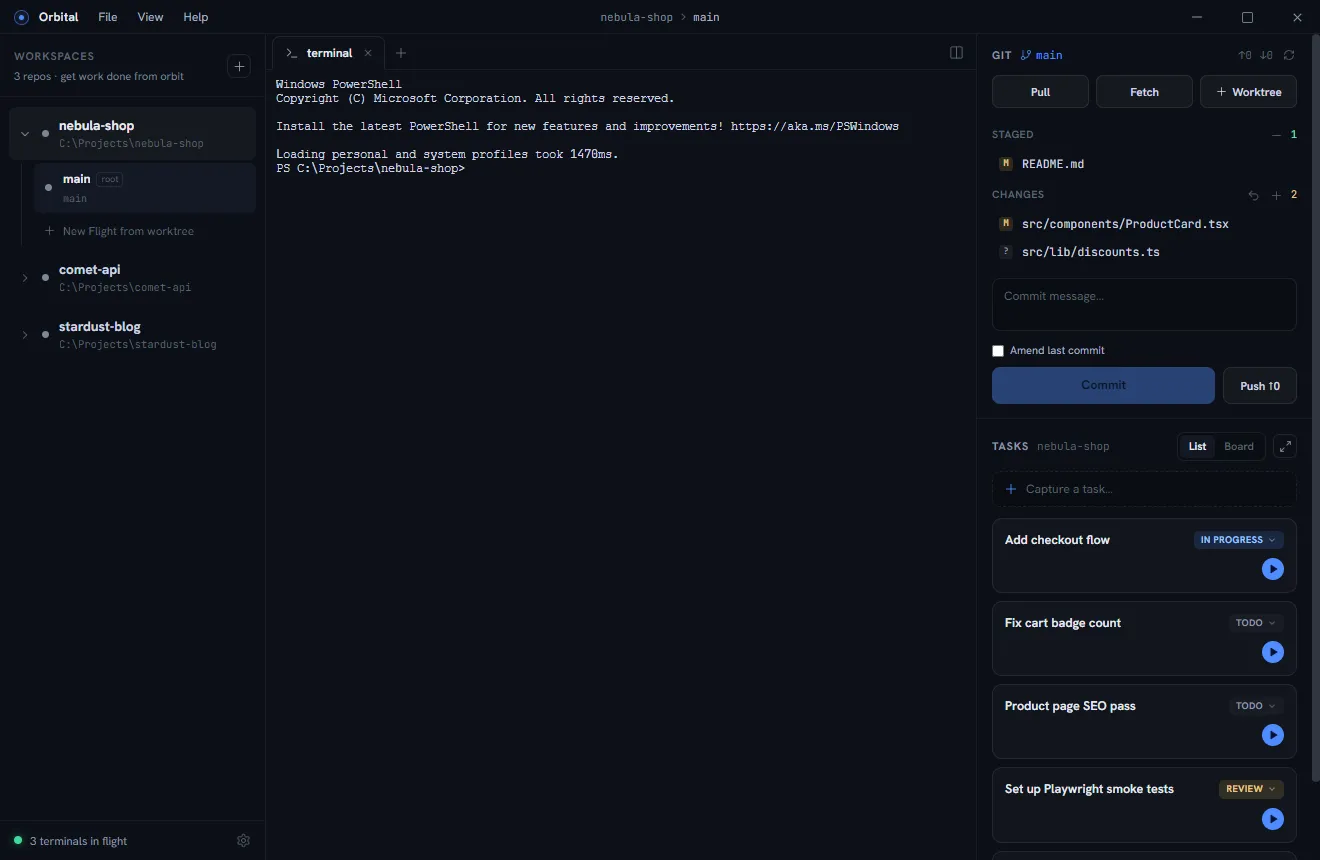
Click the + at the top of the left rail and pick your repo’s folder. The
repo appears as a project with a root worktree (main) bound to your normal
checkout — with a live terminal already running.
2. Capture some tasks
Type into Capture a task… in the right panel and press Enter. Tasks are per-project and take one keystroke to file — capture first, triage later.
3. Start a worktree for parallel work
Click New Worktree under the project (or press the ▶ button on a task to pre-link it). Pick a branch name and, optionally, the base ref to fork from.
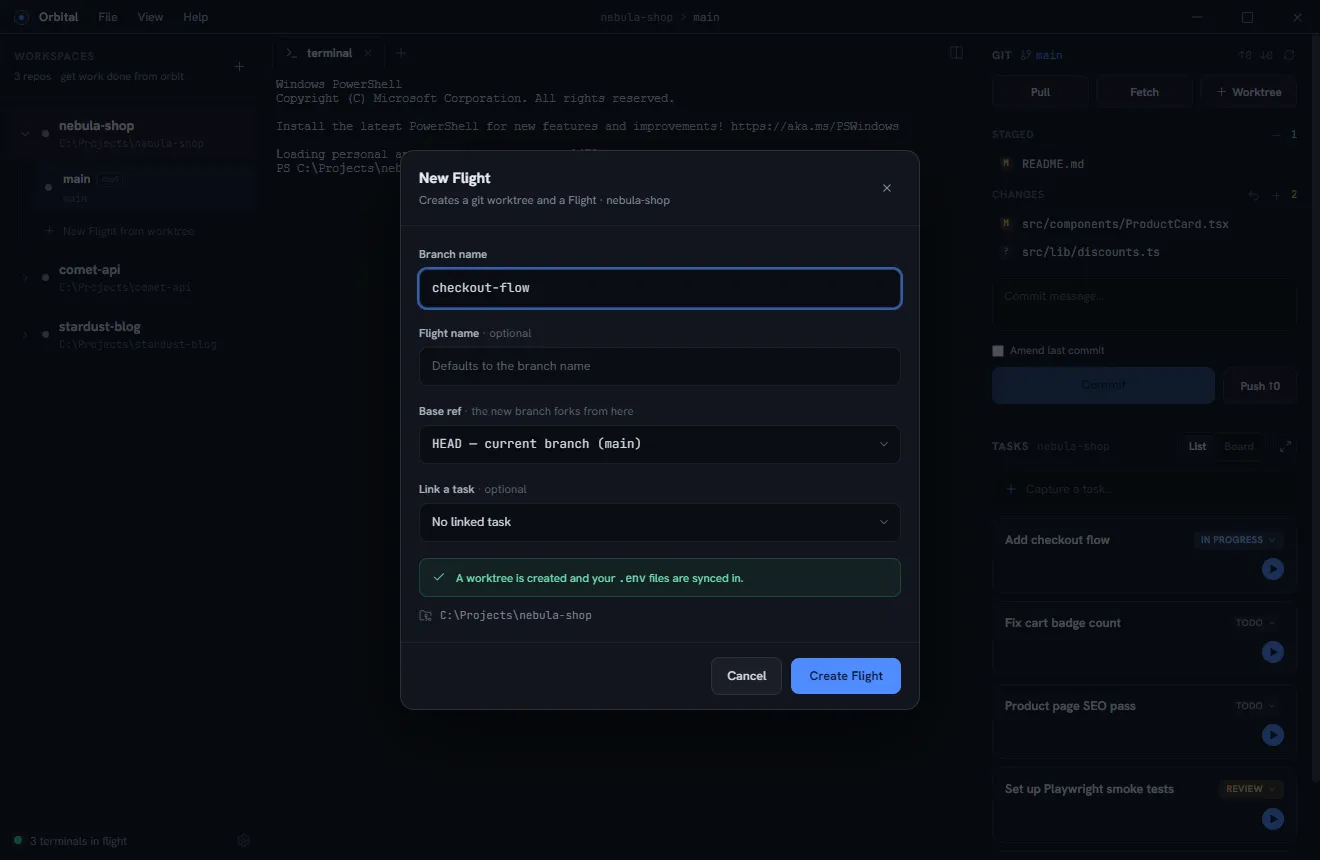
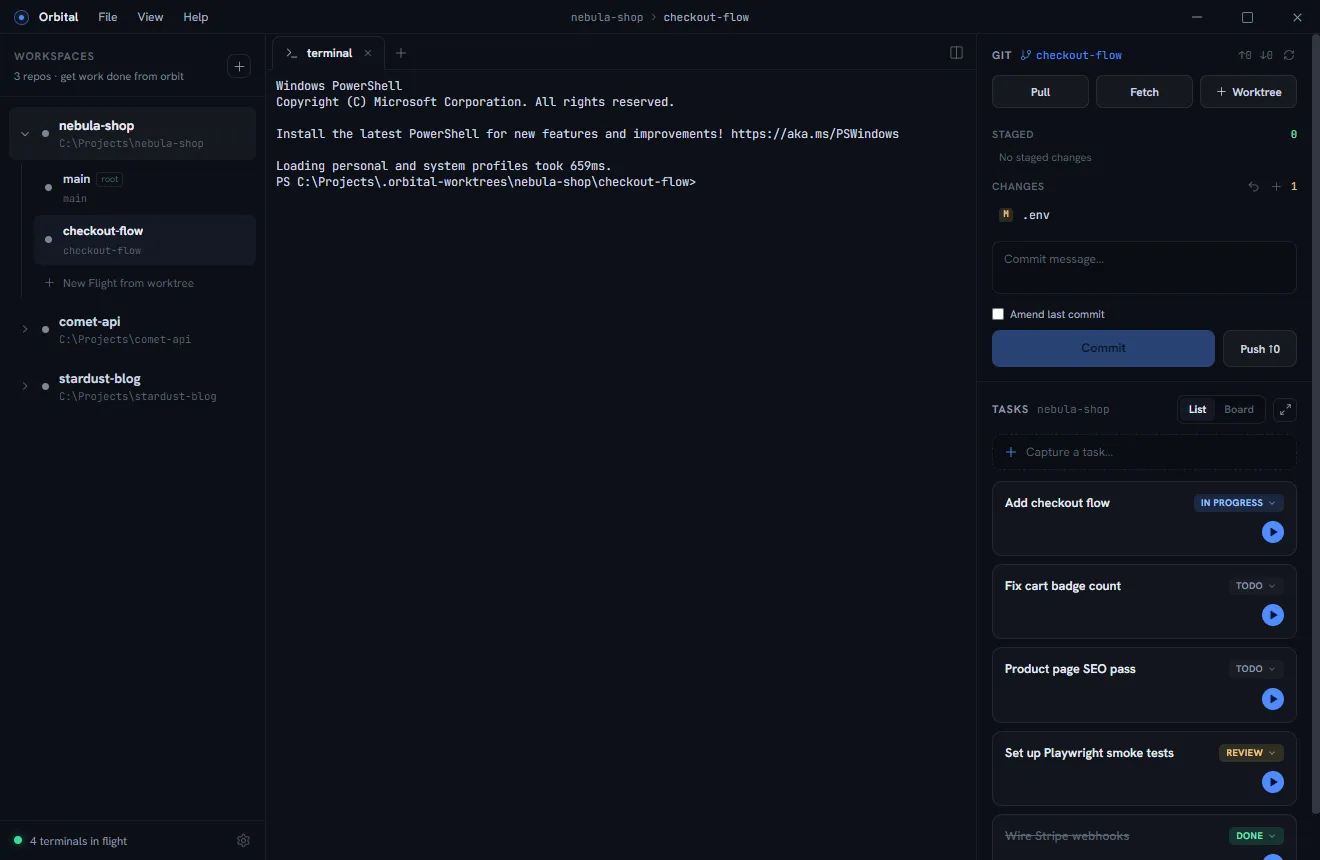
Orbital creates a git worktree in a sibling .orbital-worktrees directory,
copies your .env files into it, and opens the worktree with a fresh terminal:
4. Run an agent
Run claude (or any agent CLI) in the worktree’s terminal — or click + in the
tab strip and choose Claude to boot one directly.
5. Let statuses work for you
Install the Claude Code hooks once (Settings → Claude status hooks) and every Claude session started inside Orbital reports itself automatically: working while it uses tools, needs attention when it’s blocked on you, idle when it stops.
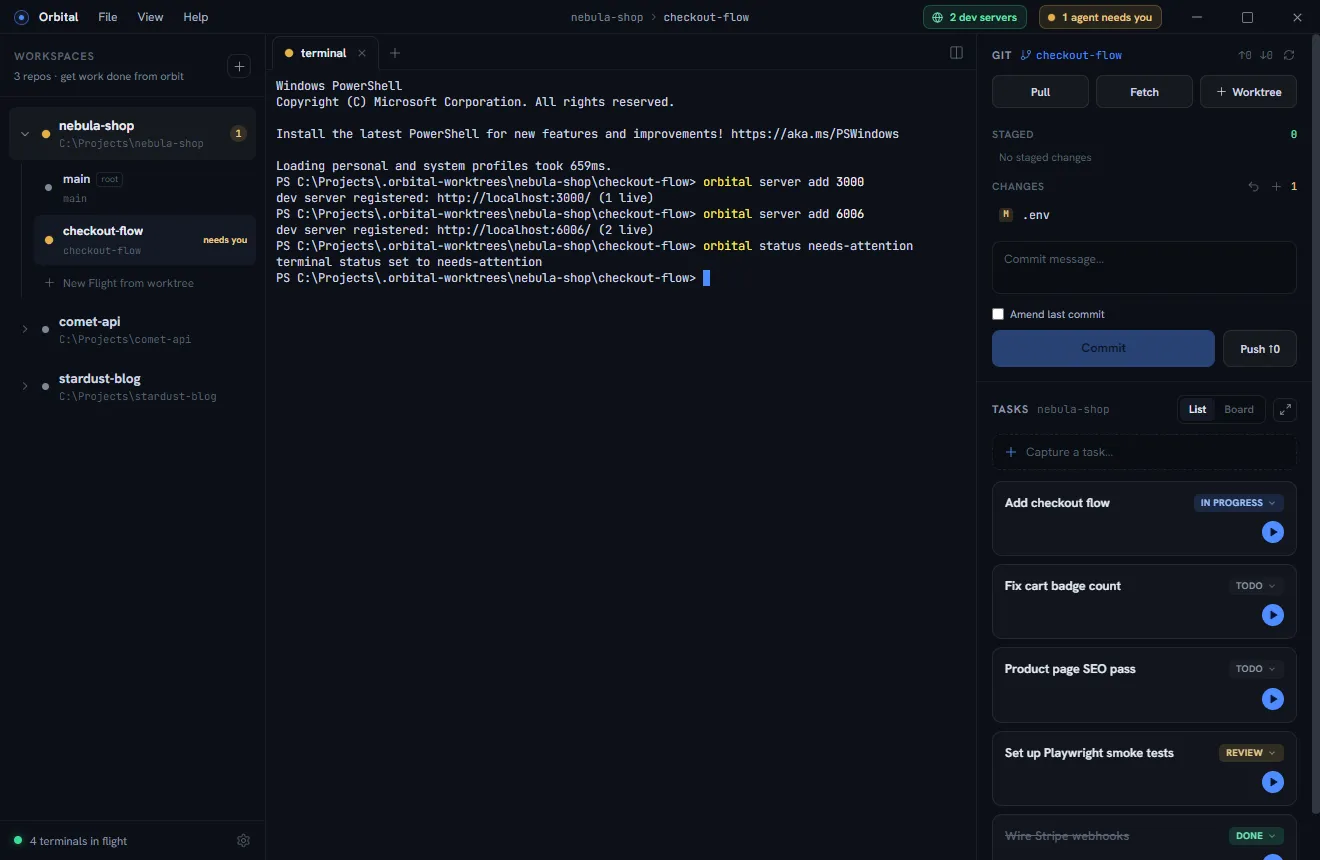
When an agent flips to needs-attention, the rail pulses, the title bar shows “1 agent needs you”, the taskbar icon gets a badge, and (optionally) a chime plays. Typing into the blocked agent clears the alert instantly.
6. Land the work
When a worktree is done: review the diff in the git panel, stage, commit, push — then right-click the worktree and Delete worktree. Mark the task done. Orbit achieved.